Instruction, Tips & Tricks
Beforehand...
- Do not worry - it is easy to set up
- Stay creative - it's all not witchcraft
- For the 1. let build up time, then it goes from the 2. construction in a jiffy
- Video tutorials to follow this year
- If you have any questions just contact us. We are here for you!
A few assembly videos (from the 1st prototype)

The idea of the bag - it has two compartments. The smaller one takes the lock (with the suction cups, if necessary). In the large compartment goes the tarp.
So you can quickly mount the lock on the vehicle first and only then the tarp.
You can either stow the pole bag and the bag with the pegs in the large compartment, or use the small storage space in the vehicle effectively. You can also put the bars under the bag. Therefore, the two compression straps of the bag are not sewn at the bottom.

It can happen that quickly. The side walls can also remain rolled up and the 3rd rod it needs only in heavy rain.

No piping rail? Each vehicle is different. At the 1. mounting first look for 2 to 3 ideal points where you can mount the suction cups. Only then knot the lock with the suction cups. After that, leave the suction cups on the lock, so you can quickly remove them from the Set up 2nd time.

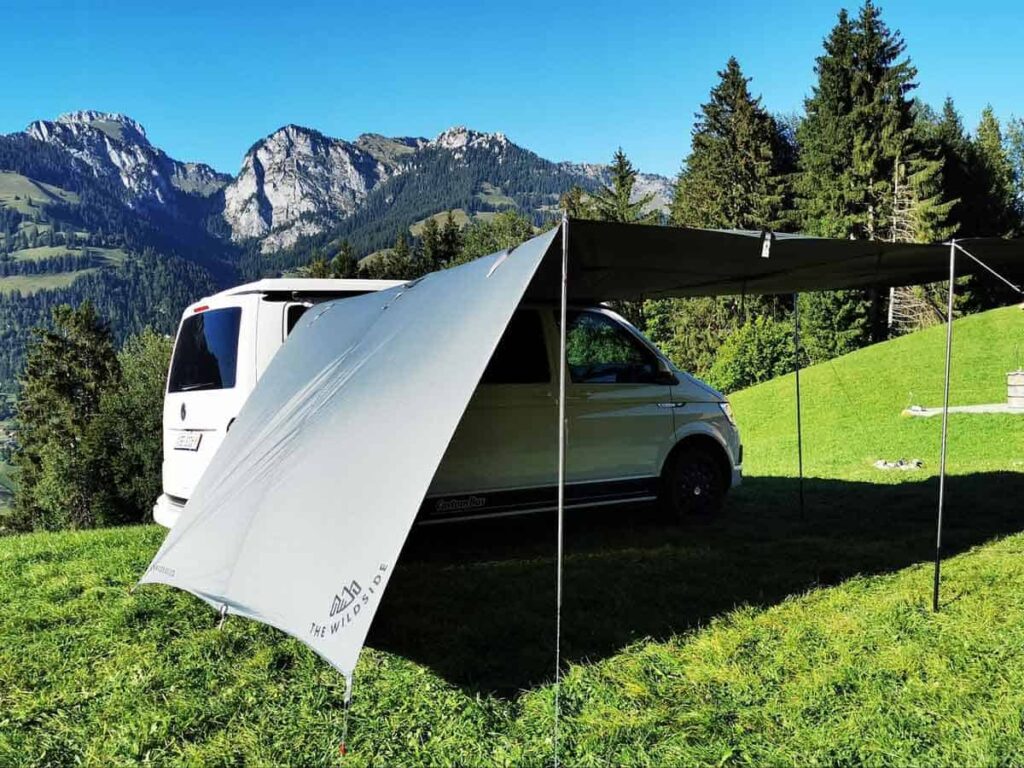
When the lock is mounted on the vehicle, you can also mount the tarp with the strong zipper.

And if you ever need the vehicle without wanting to dismantle everything - unzip, lock off and off you go (tip: put an object on each tire. So you find the exact parking position again quickly).
Stupidly, we filmed this video with only 6 poles. Of course, it also stands with 4 bars. But you can see that in the other pictures.
Here's how:
1. mounting the lock on the vehicle


Pull the lock into the keder rail of your camper.


Alternatively, you can order suction cups, which you connect to the lock and attach to your vehicle.
2. connect tarp with lock


Use the zipper to connect the sluice to the tarp. To open the zipper has some resistance on purpose for better stability.

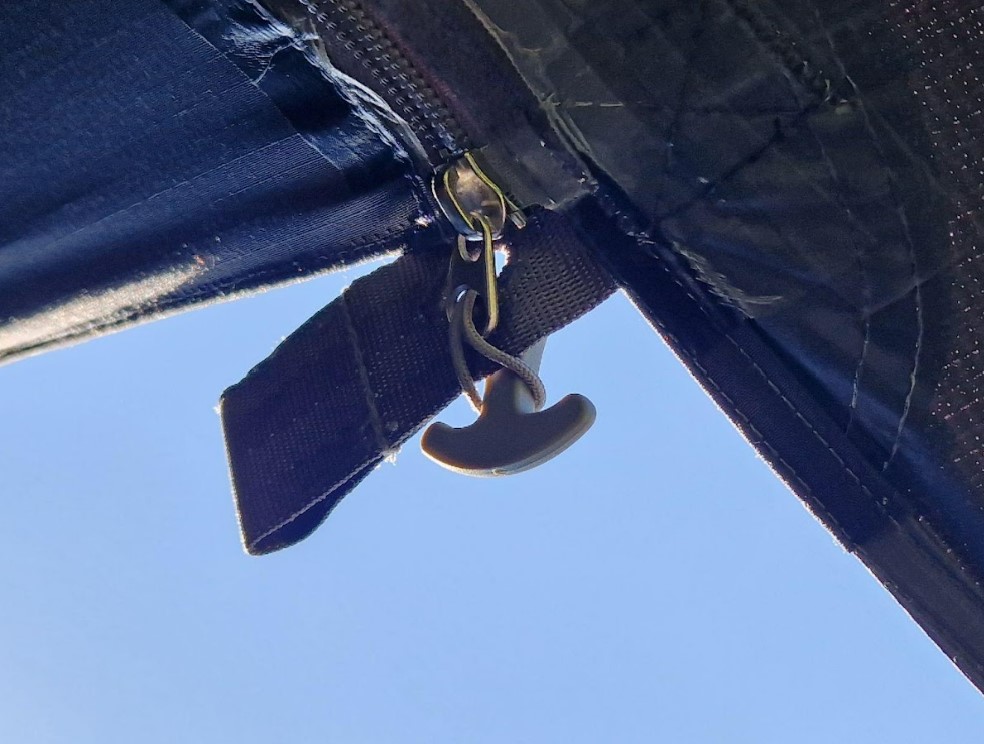
To secure the zipper, detach the loop of the T-zipper puller from the zipper puller, pull it through the "buttonhole" in addition to the zipper hole and pull it back over the T-piece to secure it. This prevents the zipper from opening.
Always make sure that the zipper ends in particular are not under too much tension. Too much tension is not necessary and is also not beneficial, as the zipper can pull out. If in doubt, set all tensioners back a few centimeters after assembly. This gives the tarp enough slack even in strong winds.
3. continue with the cords


To prepare for setting up, pull one end of the string to which you have tied the red "tensioner" (see helpful knots) through the loops to which you want to attach the first 2 poles.


Now set up the 2 poles, attach one end of the cord to the peg, anchor it and then tension the cord to the desired tension using the tensioner.
Already done! Now that you have the canopy in place, you can sit back or add more set-up options as needed.
Violence is not needed.
Do not stretch the guy ropes so tight that you can play guitar on them. The tarp is cut in such a way that it does not need to be overly braced for a nice setup. So you relieve the material and also the pegs have more chance to do their job well. Another good tip is to always place the poles at a slight angle. To retighten the guy ropes, you can also briefly set the pole at an angle than normal, retighten it, and then set the pole up again.
Construction variants The Wildside Tarp - be creative
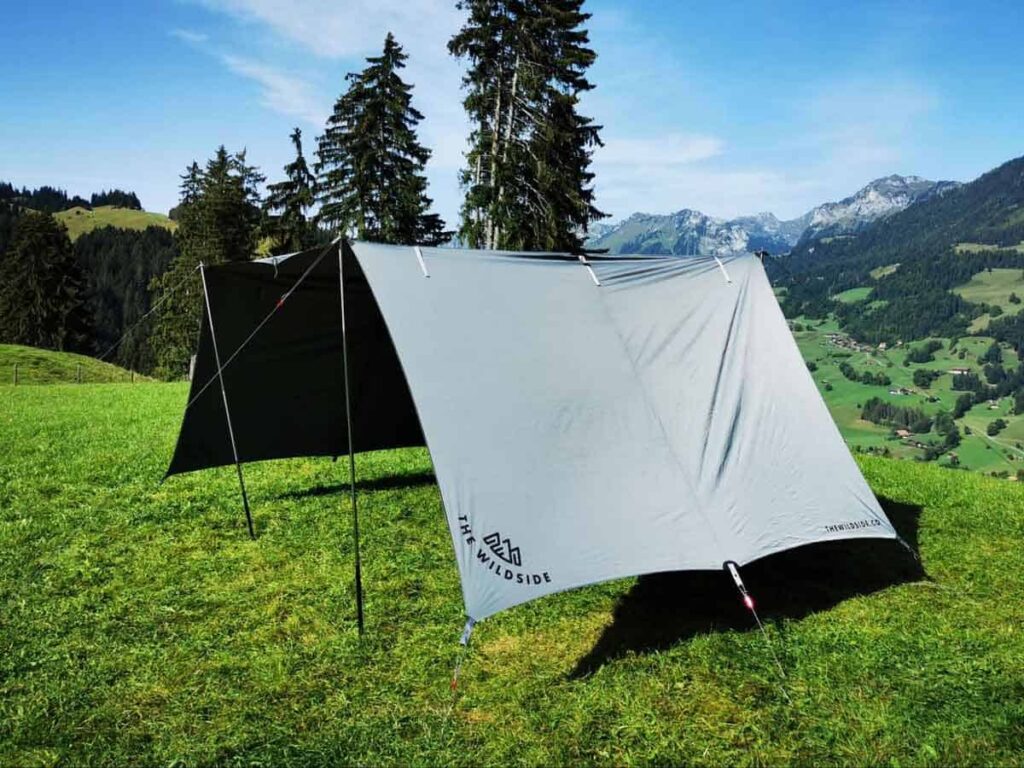
There are countless, individual build-up possibilities. Thanks to the height-adjustable bars, you can adapt the structure to your needs and daily circumstances at any time. In the following, we will show you a few practical construction variants.
Protection from the sun, wind and nosy neighbors?
You can build the protection of your outdoor area in any direction, even if the sun shines sideways or frontally you have shade. To do this, simply stretch the desired page(s) downwards.


Rainy weather?
To ensure dryness even in the rain and to prevent water pockets from forming, tension the tarp so that there is a slope everywhere and the water cannot run back to the zipper. This is very important, because although the zipper is waterproof, it pulls the teeth apart under tension and water would get through. The pole, which has a hole at the top, is designed to be inserted into the cap in the center of the tarp and secured with the pin (this prevents the pole from falling onto the car in windy conditions).
The hole is intentionally a little narrow. This is an additional assurance that the bar will stay in place. Simply insert the rod tip with a little pressure and circular movements or enlarge the hole slightly in advance with a ballpoint pen when using for the first time.


When things have to happen really fast...
Quickly build the tarp into a simple canopy.


Little space to build?
The perfect solution is the form as a gable roof


Large, covered area?
The considerable size of the tarp with almost 20m2, gives you plenty of shade and space outside your camper. Place the sides horizontally and the party can start. Dimensions: 3m x 6,5m

You are going on a trip with your camper?
Just leave the tarp and your camping utensils. Unzip the airlock, remove it from your camper, re-tension the tarp if needed, and off you go. A good tip - mark your tire position with an object before driving away. This way, when you pull up again, you can resume the exact position. Before "docking" again, loosen the guy ropes a little. Then the zipper can be easily closed without traction.


Helpful nodes
The bowline - an all-rounder

How do I attach the end of the line to the red tensioner?

and the other end on the herring?


and how the cord between the suction cup and the lock?
The bowline is a good solution for this.
Tie off cords

How do I tension cords? (before additional tightening with the tensioner)
The cord to tie off is too long, how to shorten a cord/rope?
How do I wind cords neatly?
More tips
Stuffing instead of folding
The tarp can be easily stuffed into the duffle bag. Store the airlock in the small compartment of the bag - so you have it ready to hand when setting up, even in rainy weather.
Tarp pole alignment
Never set up the poles bolt upright. If they are at a slight angle (preferably opposite to the guy line), they can better absorb and dissipate the forces from the wind.
For stable standing, slide the bars into the optimal position and adjust the angle of inclination to the circumstances. They do not have to be at a vertical angle to the floor.
Drive pegs correctly
Insert the pegs into the ground at a 45 degree angle with the tip in the ground facing the tarp. Only in this way can they absorb the maximum force. If the herring is set too shallow, it can break out. If it is too vertical, it can be pulled out of the ground by even a slight breeze.
No violence
One is often inclined (we are too) to stretch the cords and the whole tarp extremely tight. So that you can play the guitar on the guy ropes. However, this is not at all necessary and the material will thank you if it is not overly strained. It should not flutter and sag, but that's all that is necessary.
Water flows down
Why do house roofs usually have a gable? Because this is the best way for the water to drain. If it rains, tension the tarp so that there is a slope everywhere. So there are no water pockets and you can sit under it even in the pouring rain and enjoy the forces of nature.